| Insert Heat maps | |
|
NOTA: In case you are using Windows Vista or Windows 7, it is necessary to give permission to the installation file of the product as it is in this video of example. http://www.jabsoft.com/model_builder_for_excel/videos_emb/security_demo_xmb/security_demo.htm In your case probably the path would be similar to this C:\Archivos de programa\JABSOFT\Dashboards Tools for Excel. |
|
| Video online | |
A Heat map is a graphical representation of data where the values taken by a variable, in a two-dimensional (or more) map, are represented as colors, size, background, etc. With Heat maps you can analyze your data with up to 5 dimensions, using: |
|
|
With this functionality you will be able to perform simply, an analysis of the data analysis several criteria of analysis simultaneously. You will have the ability to view in a consolidated way up to 5 rules of analysis, It is to say that you may either quickly get a view of the data analyzed from several criteria. Moreover there is a gallery of examples to help you creating quickly your own cases for data analysis. You can customize your rules for the analysis and save your models for future sessions. |
|
| Add Examples |
|
| If you don't have any rules table, click on the icon to get one. | |
| Delete rules |
|
| From this button you can delete the current rule. | |
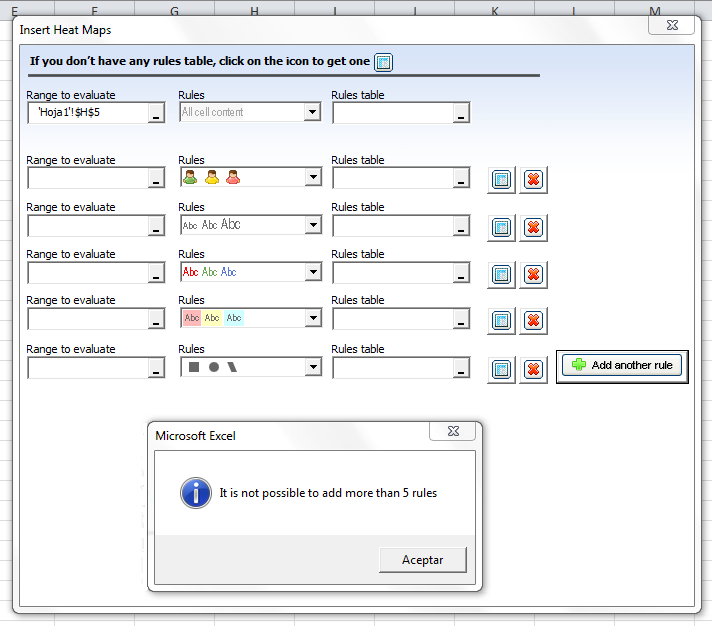
| Add rules |
|
| Press the button add another rule to add new rules table. | |
| It should be noted that the main rule is applied by default, shows all formats of his rule table (image, font size, font color, backcolor, content) | |
 |
|
| Starting the second rule you can choose which formats to include in the rules. | |
| When you press add rule for the first time the Rule 2 appears by default containing all possibilities formats to create rules. | |
| Each time you press the button rule table format, possibilities will spread according to the rules you have created. | |
| Content to copy | |
All cell content |
|
Choose this option to copy the entire contents of the cell. |
|
| All cell content this option includes all the format of the cell, it is to say that if you choose all cell content subsequent to a determined rule, the rule all cell content will replace all the formats. | |
image |
|
choose this option, Take the image only. |
|
Font size |
|
Choose this option, Take font size only. |
|
Font color |
|
Choose this option, Take font color only. |
|
Cell backcolor |
|
Choose this option , Take only the background color of the cell. |
|
Text and font type |
|
Choose this option, Take only text and font of the cell. |
|
 |
|
| Save | |
| From this button "save" you can save the current model . | |
 |
|
| The option Models saves your information in a hidden sheet of the workbook. | |
| Execute |
|
| From this button you can run the current configuration of the rules. | |
| -------------------------------------------------------------------------------------------------------------------------- | |
| Sample | |
| 1 .- First select the range to Evaluate. | |
| 2 .- Chosee a Rule to use: | |
| 3 .- Select the range with rules table as shown in the sample picture: | |
 |
|
| Note 1: If you will apply images in your rules table, you must take into account that images must have less height and width than the respective cell to permit the image be centered within the borders of the cell. | |
| 4. For adding a new rule, press the add another rule button. | |
| You can continue adding rules depending on the rules used so far, i.e. in this example we use a rule already differentiated by the font color and consequently now let's add a third rule that is not available. | |
 |
|
| We added a third rule based on Backcolor. | |
| We chose the corresponding range of the rule table and the range to be evaluated. | |
 |
|
| We chose the destination range where it should be the results pasted. | |
| Now press the execute button and the 3 rules have been implemented simultaneously as shown in the image. | |
 |
|
| Note 2: In order to make the tool work correctly, the headings of the columns from their ranges to evaluate must be different. | |
| See more : | |
|
Microsoft Office (64 bits): |
|